
HOMER Pro 3.16

![]()
The PV page allows you to enter the cost, performance characteristics, and orientation of an array of photovoltaic (PV) panels and choose the sizes you want HOMER to consider as it searches for the optimal system. The PV component can represent both flat panel and concentrating PV technologies. You can specify whether a PV is a concentrating PV in the Photovoltaic Library.
The PV page provides access to the following tabs:
•Inverter: If the Electrical Bus is set to AC, you specify inverter parameters here.
•MPPT: If the Electrical Bus is set to DC, you set the parameters of the maximum power point tracker (DC to DC converter) here.
•Advanced Inputs are where you can set certain advanced variables.
•Temperature: You specify whether to consider the effect of ambient temperature on panel efficiency, and if so set the relevant inputs.
To add a solar component, click the PV button under the Components tab in the toolbar. On the PV Set Up page, select an option from the drop-down list and click the Add PV button. On the PV page, you can manage information for the model.
Costs
The Costs table includes the initial Capital cost and Replacement cost per kilowatt of the PV system, as well as annual operation and maintenance (O&M) costs per kilowatt.
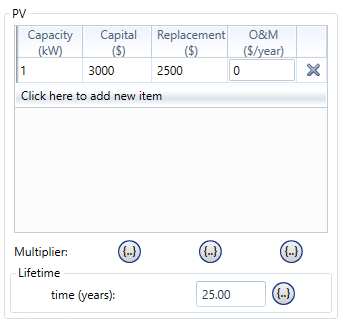
When specifying the capital and replacement costs, be sure to account for all costs associated with the PV system, which may include:
•PV panels
•Mounting hardware
•Tracking system
•Wiring
•Installation
You can include the costs of the power electronics in the capital cost, or account for them separately in the MPPT or Inverter tab.
Note: The capital cost is the initial purchase price, the replacement cost is the cost of replacing the PV system at the end of its lifetime, and the O&M cost is the annual cost of operating and maintaining the PV system.
Cost Curve
In the Costs table, enter the PV cost curve, meaning the way the cost varies with size. Typically this requires only a single row because analysts often assume that PV costs vary linearly with size. In the sample above, the capital cost of PV panels is specified at $3,000/kW and the replacement cost is specified at $2,500/kW. The operating and maintenance (O&M) cost is specified as 0.
If the cost of the PV subsystem was not linear with size, you can enter multiple rows of data in the Cost table. For example, if the marginal capital and replacement costs dropped to $2,500/kW and $2,100/kW, respectively, for quantities above 2 kW, fill in the Cost table as follows:
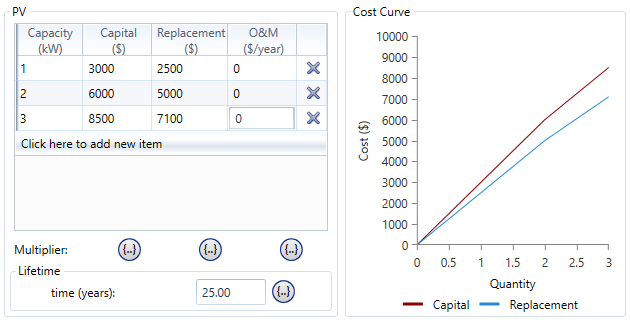
If HOMER then simulates a system with a PV array size of 0.1 kW, it would extrapolate from the 1 kW and 2 kW costs, giving a capital cost of $300. For a PV array size of 2.5 kW, HOMER would interpolate between the 2 kW costs and the 3 kW costs, giving a capital cost of $7,250. For a PV array size of 6 kW, HOMER would extrapolate from the 2 kW and 3 kW costs, giving a capital cost of $16,000.
Note: The capital cost is the initial purchase price, the replacement cost is the cost of replacing the PV panels at the end of their lifetime, and the O&M cost is the annual cost of operating and maintaining the PV array.
Search Space
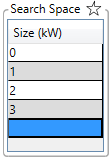
Click the MPPT or Inverter tab to see the Search Space. Enter the nominal capacity of the PV in kW, or enter several quantities for HOMER to consider in the system optimization. Include a zero if you wanat HOMER to consider systems without this PV.
Click the Star icon to enable the optimizer. The search space is replaced by a lower bound and an upper bound. With the optimizer turned on, HOMER automatically finds the best capacity for you.
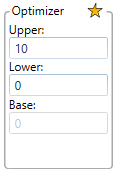
See the help article about Optimization for a more detailed explanation of HOMER's optimizer.
PV Inputs
From the main section of the PV page, you can edit the following inputs.
Variable |
Description |
Electrical Bus |
This determines whether the PV array produces AC or DC power. All PV cells produce DC electricity, but some PV arrays have built-in inverters to convert to AC. |
Lifetime |
The number of years before the PV panels must be replaced at the replacement cost specified in the costs table. |
A scaling factor applied to the PV array power output to account for reduced output in real-world operating conditions compared to operating conditions at which the array was rated. |
Note: To the right of each numerical input is a sensitivity button ( ) that allows you to do a sensitivity analysis on that variable. For more information, see Why Would I Do a Sensitivity Analysis?
Inverter
This option is available if the PV component is on the AC bus. Solar Inverters convert the DC electricity produced by the solar panels into AC electricity. Using HOMER Pro, we can calculate the optimal sizing of the solar panel and its inverter. The solar panel’s output is the DC power and the output of the inverter is the AC power rating. The ratio of DC capacity (solar panels) to the inverter’s AC power rating is the DC-to-AC ratio. A 120-kWdc solar array with a 100- kWac inverter has a DC-to-AC ratio of 1.2. The typical value for DC-AC ratio is >1 (usually around 1.2)
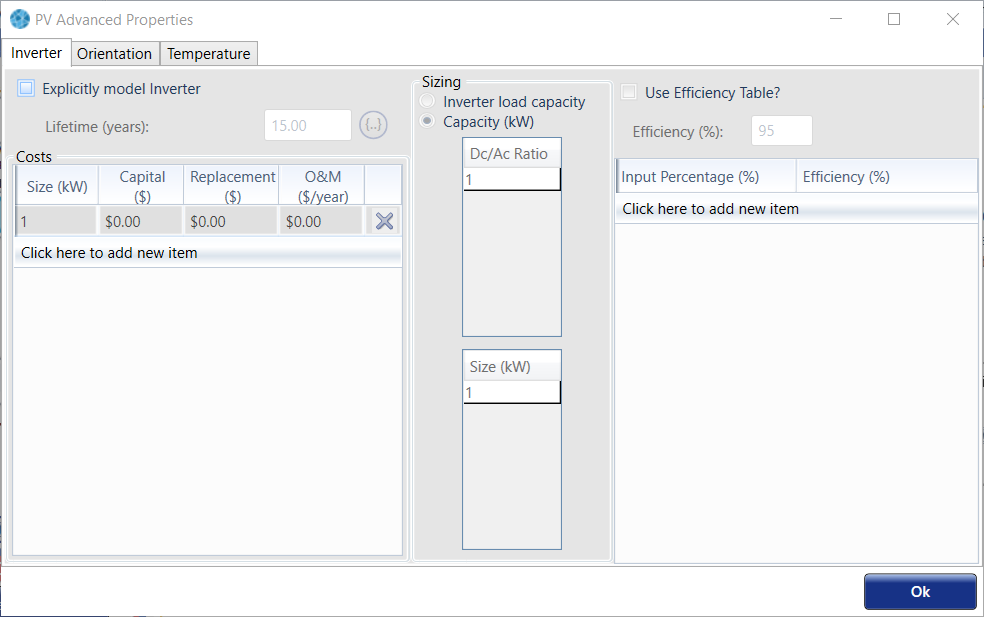
For sizing the solar inverter, HOMER Pro offers two ways to go about this –
1.Enter a list of DC-to-AC ratios
2.Enter a list of Inverter Capacity (kW)
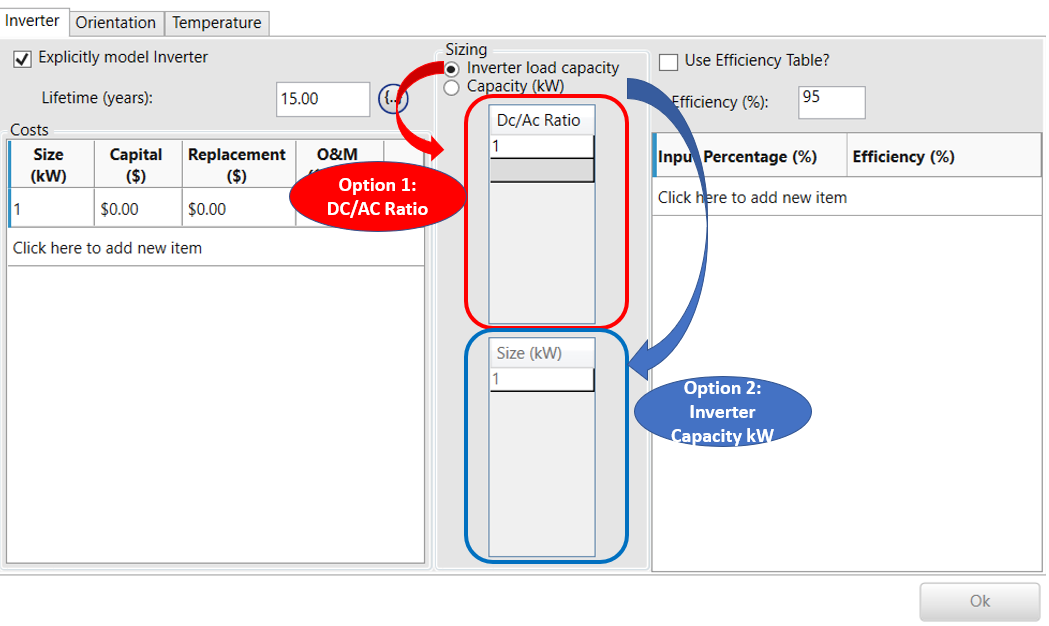
You can define the Cost table, size (Size your own), and lifetime in a similar manner as other components. You can also specify the efficiency with a single value, or check "Use efficiency table," and enter values for efficiency versus input load percentage. If you do not want to model the inverter, uncheck the “Explicitly model Inverter” box.
MPPT
A Maximum Power Point Tracker (or MPPT) is a DC to DC converter that matches the PV to the DC bus voltage, while varying the voltage of the PV array itself to maximize the power output. The inputs for the MPPT are identical to those for the inverter, described above.
Advanced Inputs
The Advanced Input tab contains options that affect the calculation of the PV power output. The article How HOMER Calculates the Radiation Incident on the PV contains more information on ground reflectance, panel slope, and panel azimuth.
Variable |
Description |
The fraction of solar radiation incident on the ground that is reflected, in % |
|
The type of tracking system used to direct the PV panels towards the sun |
|
Use default slope |
If this input is checked, the slope input is disabled and the slope is set to match the latitude |
The angle at which the panels are mounted relative to horizontal, in degrees |
|
Use default azimuth |
If this input is checked, the azimuth input is disabled and the azimuth is set to 0 or 180 degrees for projects in the northern or southern hemisphere, respectively |
The direction towards which the panels face, in degrees |
Temperature
The Temperature tab allows you to set or ignore temperature effects. See How HOMER Calculates the PV Array Power Output for detailed information on temperature effects on power, nominal operating cell temperature, and efficiency at standard test conditions.
Variable |
Description |
Consider Effect of Temperature |
Whether HOMER considers the effect of PV cell temperature on the power output of the PV array |
A number indicating how strongly the power output of the PV array depends on cell temperature, in %/degrees Celsius |
|
The cell temperature at 0.8 kW/m2 and 20°C ambient temperature in degrees Celsius |
|
The maximum power point efficiency under standard test conditions, in % |
See also
How HOMER Calculates the PV Array Power Output
How HOMER Calculates the PV Cell Temperature
