HOMER Pro 3.16

![]()
PVsyst is a software package for studying, sizing, simulation, and data analysis of PV systems. You can incorporate PVsyst data from a specially formatted comma-separated value (CSV) file in your HOMER models using a Wizard or by creating a Custom Component.
Exporting Data from PVsyst
HOMER Pro only recognizes a specific format for exported PVsyst data. This means you have to customize in the PVsyst software before importing the data into HOMER. Below are steps you can follow to get the PVsyst output in HOMER acceptable format. By following these steps, you will end up with a two-column CSV file of date and power output. Save this file, and import it into HOMER Pro.
Steps to get output from PVsyst into HOMER acceptable input:
•Date and time format in the first column; use the PVsyst default format: (DD/MM/YY MM:SS)

•A semicolon (;) as the delimiter for the CSV

•Hourly data

•Units must be in kW

•The only defined variable is the PV production data in kW from your modeled array. The name of the defined variable can change, depending on the system modeled in PVsyst. You must select the PV production data that you want to use in HOMER. Ensure that you are only exporting one defined variable.

•By default, the top 13 lines of the exported CSV contain information about the PV system and the location. The first date/production value line starts below these lines. You do not need to edit the exported PVsyst file to exclude these lines of metadata.
Importing the CSV File Using PVsyst Wizard
You can import the specially formatted file from PVsyst into HOMER Pro using the PVsyst Wizard.
1.Click the PV icon under the Components.
2.To access the PVsyst Wizard in HOMER, click the PVsyst Wizard button on the PV Set Up page. The first page of the Wizard provides instructions.
2.
2.Click the Next button for further instructions on exporting PVsyst in a format recognized by HOMER.
3.Click the Choose File button. Select your PVsyst CSV file. The imported data appears as shown below.

5.View the PV Power DMAP to verify that the project, simulation, and annual energy produced are correct.
Note: If the imported power output accounts for energy loss and is negative at any time step, HOMER will treat these values as zero.
6.Click the Next button and the Done! button to complete the Wizard. The PVsyst Custom Component appears.
7.Enter the total installation cost and total operational (O&M) costs for the installed system.
8.Select whether the PV production calculated by PVsyst contributes to the AC or the DC bus.
Note: For more information on the Search Space and Cost inputs for the Custom Component, see the Completing the Custom Component section below.
Importing PVsyst Files Using a Custom Component and Resource
The manual method for importing PVsyst files is to first create a Custom Component and Custom Resource.
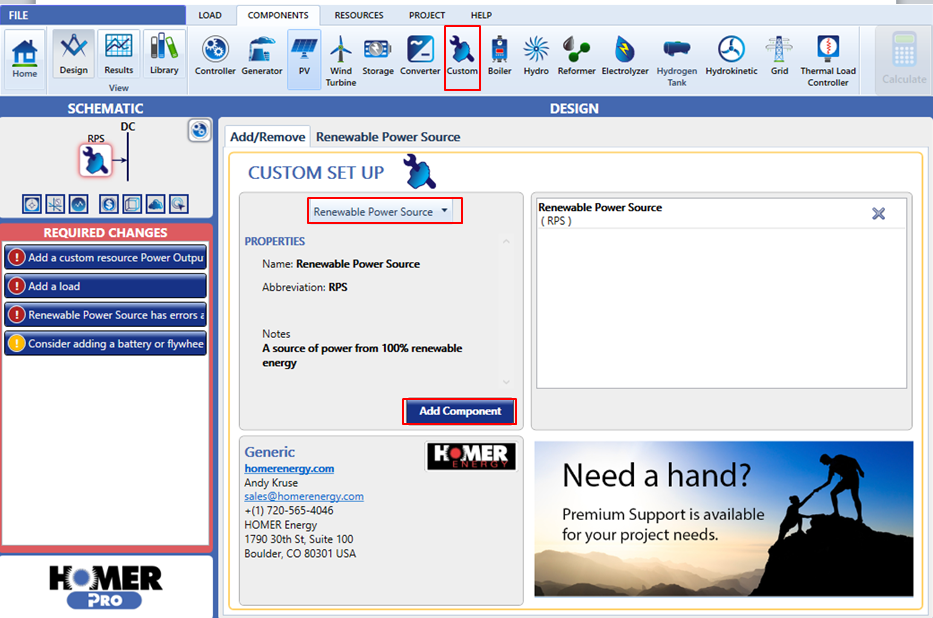
1.Click Custom under the Components tab. On the Custom Set Up page, select Renewable Power Source from the drop-down menu.
2.Click the Add Component button to create the new Custom Component.

3.Optionally, you can change the icon for the Custom Component to a PV icon by selecting it from the drop-down menu of images.
![]()
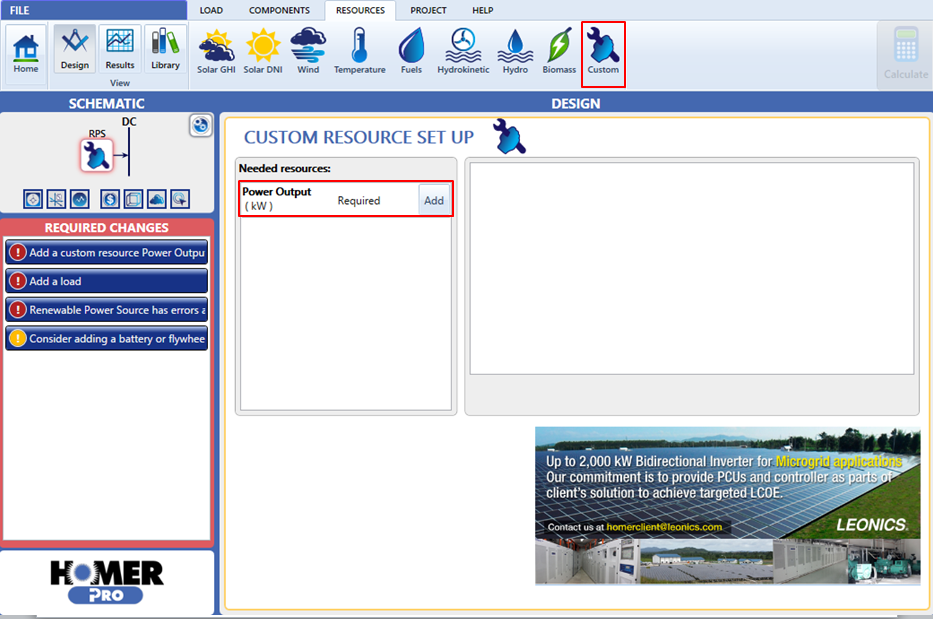
4.Custom Components need a Custom Resource. Click Custom under the Resources tab.
5.On the Custom Resource Set Up page, click the Add button.

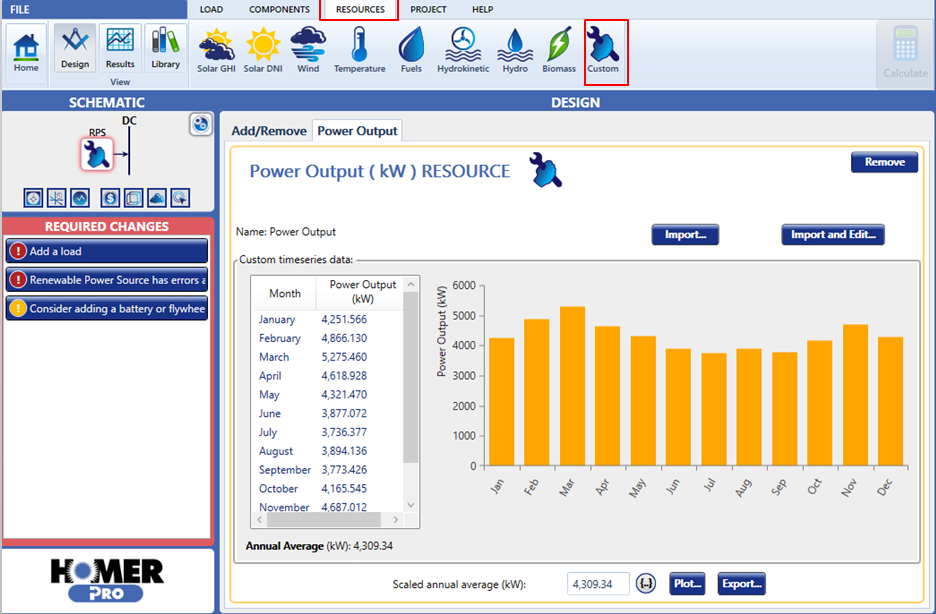
6.Click the Import button. Complete the import process to import the downloaded CSV file (refer to Exporting Data from PVsyst section at the beginning of this article to understand how to download the file)
Note: If the imported power output accounts for energy loss and is negative at any time step, HOMER will treat these values as zero.

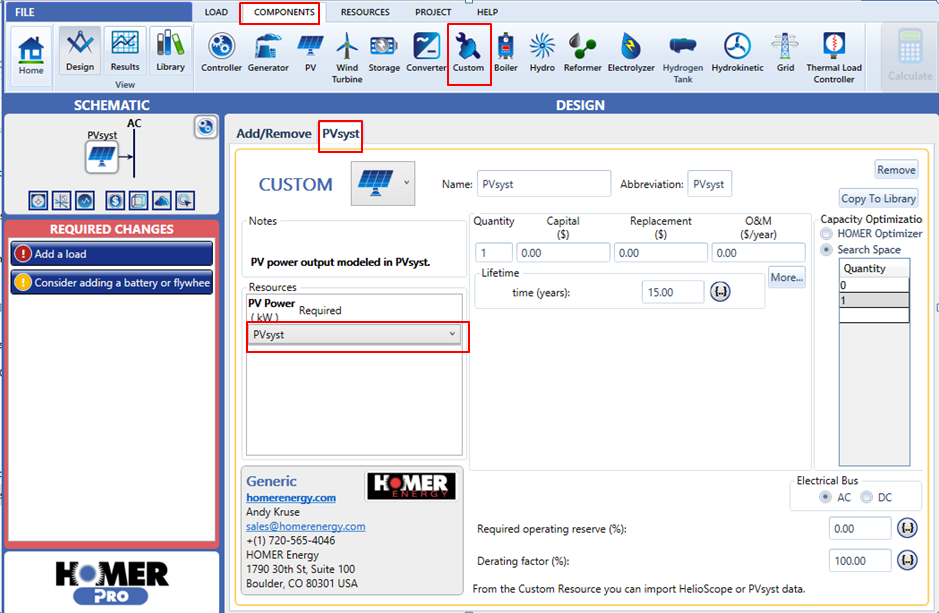
7.Return to the Custom Component page. Select Renewable Power Source from the drop-down menu.
8.Select the appropriate Resource from the PV Power drop-down menu of Custom Resources. The imported PVsyst data appears.

9.Enter the total installed cost for the system, the electrical bus, and size of the PV panel you modeled in PVsyst.
10.Choose whether to use the Optimizer with the PV data, as described in the Completing the Custom Component Setup section below.
Completing the Custom Component Setup
After you have successfully imported or uploaded the PVsyst data, the Custom Component icon (or the icon you selected) is added to your system schematic. Click the icon to enter installation and O&M costs. The costs must represent the entire system size that PVsyst simulated.
If you only want the system to analyze the PV Component with or without the PV system size that PVsyst simulated, click the Search Space radio button and enter 0 and 1 only, where 1 represents the full installed capacity modeled within PVsyst.
If, on the other hand, you want the system to analyze whether it would be most economical to install a certain percentage of the system calculated in PVsyst, click the HOMER Optimizer® radio button and enter an upper boundary greater than 1.
The power of combining the analysis of PVsyst and HOMER Pro comes from using the HOMER Optimizer with the PVsyst production results. The results show a decimal value if you use the Optimizer. A decimal between 0 and 1 represents a percentage of the PV array modeled; likewise, a number greater than 1 represents an installation size greater than what was modeled in PVsyst.
See also
How HOMER Calculates the PV Array Power Output
How HOMER Calculates the PV Cell Temperature
