HOMER Grid 1.10

To access the Demand Response Library, select the Library icon  found on the upper right hand corner of the main HOMER Grid window. Choose the Demand Response tab as highlighted in blue below.
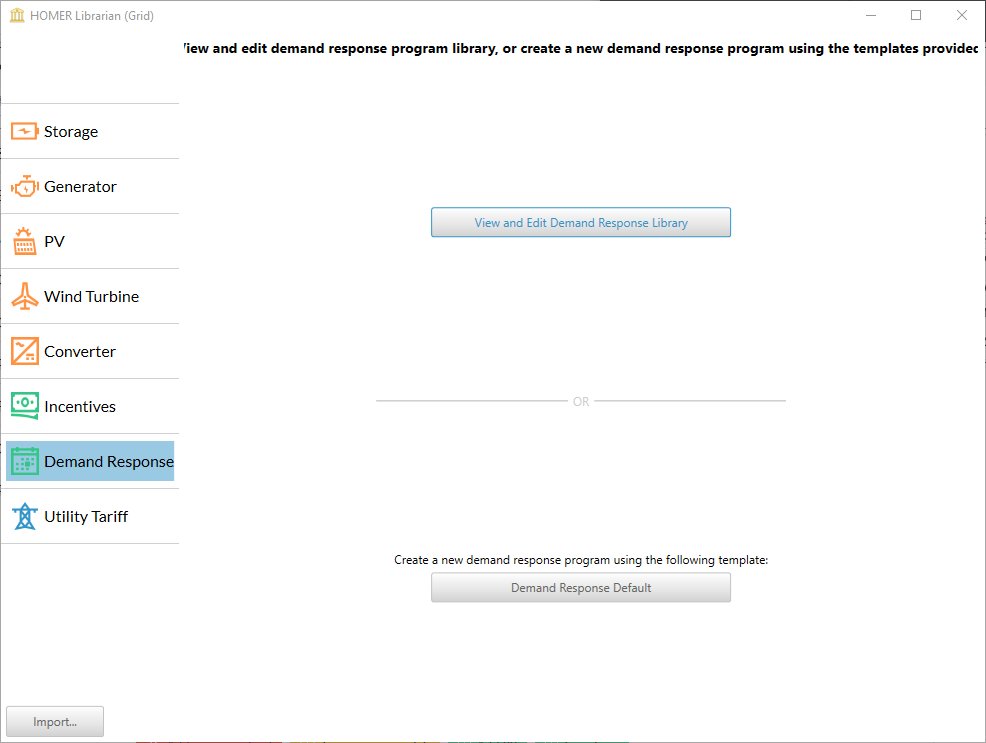
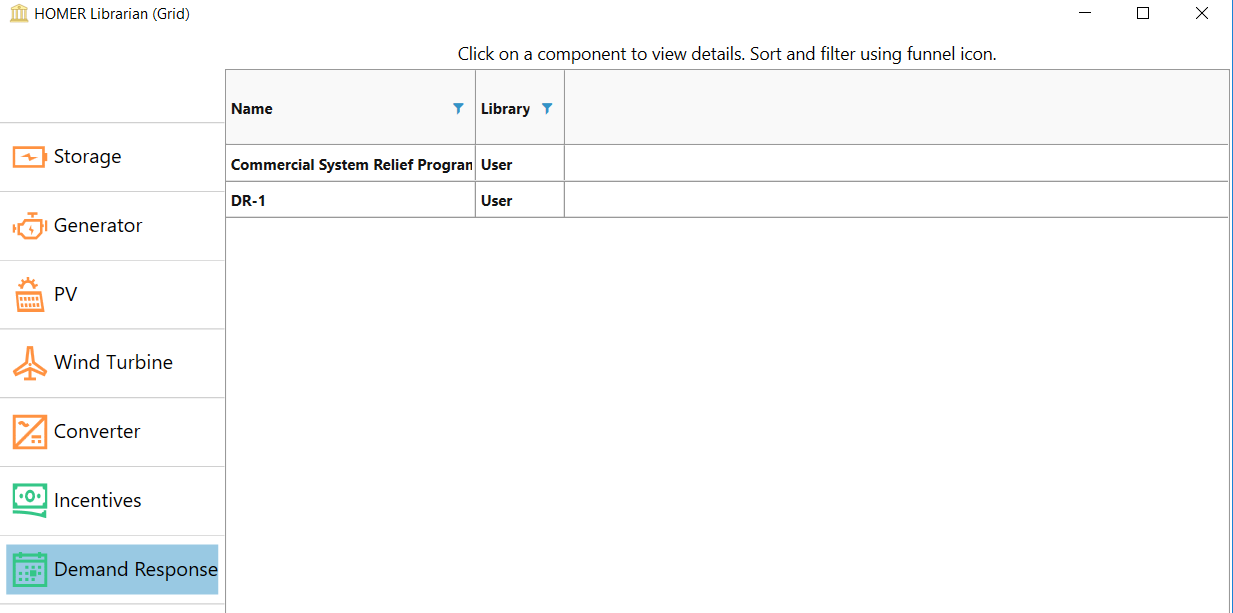
Click View and Edit Demand Response Library to see the list of existing DR programs in the HOMER Library. Select a program from the list to view details. You may also create a new DR program by copying an existing entry and changing the specifications.
Once you have selected an item to edit, follow these 4 steps to create a new Demand Response program in the library.
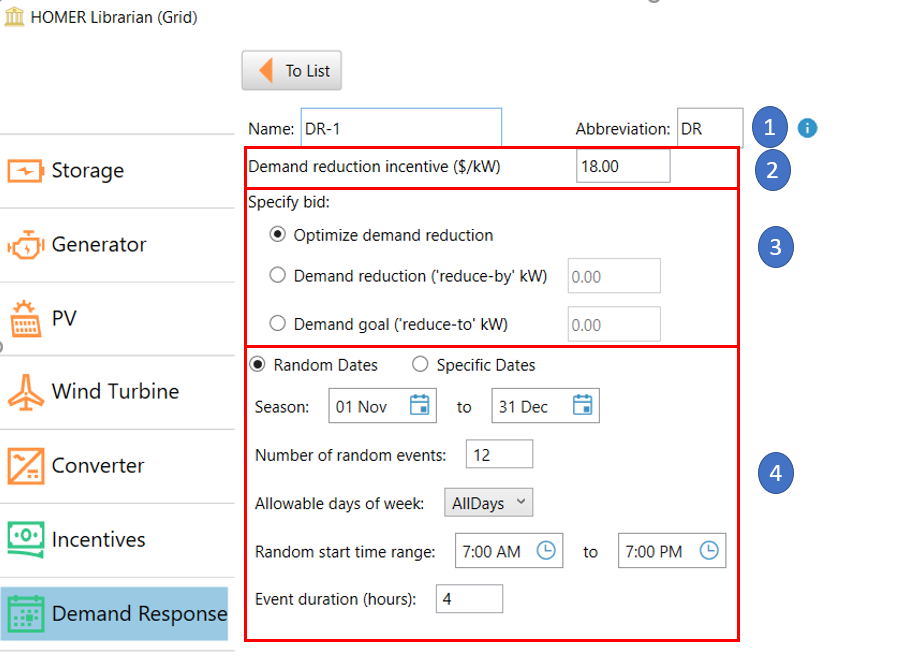
1. Enter the name of the demand response program
2. Enter the Demand Reduction Incentive
This is usually provided by the utility - a certain $ for every kW reduced.
3. Choose a bid type and amount
You next choose a bid type and amount. There are three choices - optimize bid amount, reduce demand, or limit grid purchases to a maximum during an event.
Optimize demand reduction: This is the best choice when you are in an early modeling stage and do not yet have an estimate for a bid amount. HOMER will find the most economical bid amount. Please note that the bid amount is the same for every event within 1 program.
Demand Reduction: Use this to set grid purchases to reduce your baseline load by a set number of kW. If you set this to 50 kW, then during the DR event, the grid purchases will be less than the baseline load by at least 50 kW.
Demand goal: Select this to set an upper limit on the grid purchases during the demand response event, then you choose the third option "Demand goal (reduce-to kW)". For example, if you set this to 50 kW, then the grid purchases will never exceed 50 kW during the DR events.
To serve any un-served load during the event, HOMER will use on-site generation available to it.
4. Choose dates when the utility will declare a Demand Response event
The final step is to choose the dates in which the DR event could occur. You may select one of the two options below.
•Allow HOMER to pick random dates in a time period
•Pick specific dates on which the events could occur
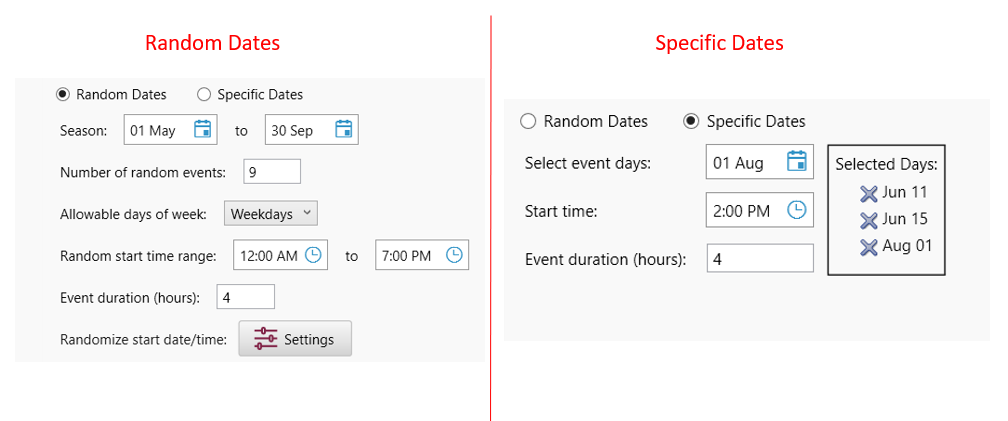
Random Dates
Specify the following inputs.
Name |
Description |
Season |
The timeframe between which the DR events could occur. For example, the events could happen in the summer season where there is a higher chance of peak days |
Number of random events |
The total number of events that can occur in the season |
Allowable days of week |
The days of the week, the DR event is likely to occur. Options are: Weekdays, All days, M-F |
Random start time range |
The range of times that the start time of the DR event could be. For example the DR event could start anytime between 9 am and 5 pm. |
Event duration (hours) |
The number of hours the DR event would last. The duration should not let the event span multiple days. Adjust your start time range and duration to prevent DR events from spanning multiple days. |
Randomize start date/time |
If you would like to test sensitivities of start date times, then click on the "Settings" button. Note that any changes made here will have an affect on both outages and demand response. |
Specific Dates
Specify the following inputs.
Name |
Description |
List of Dates |
The list of event dates |
Start Time |
The time every event would start on |
Event duration |
The number of hours every event in the list would last. |
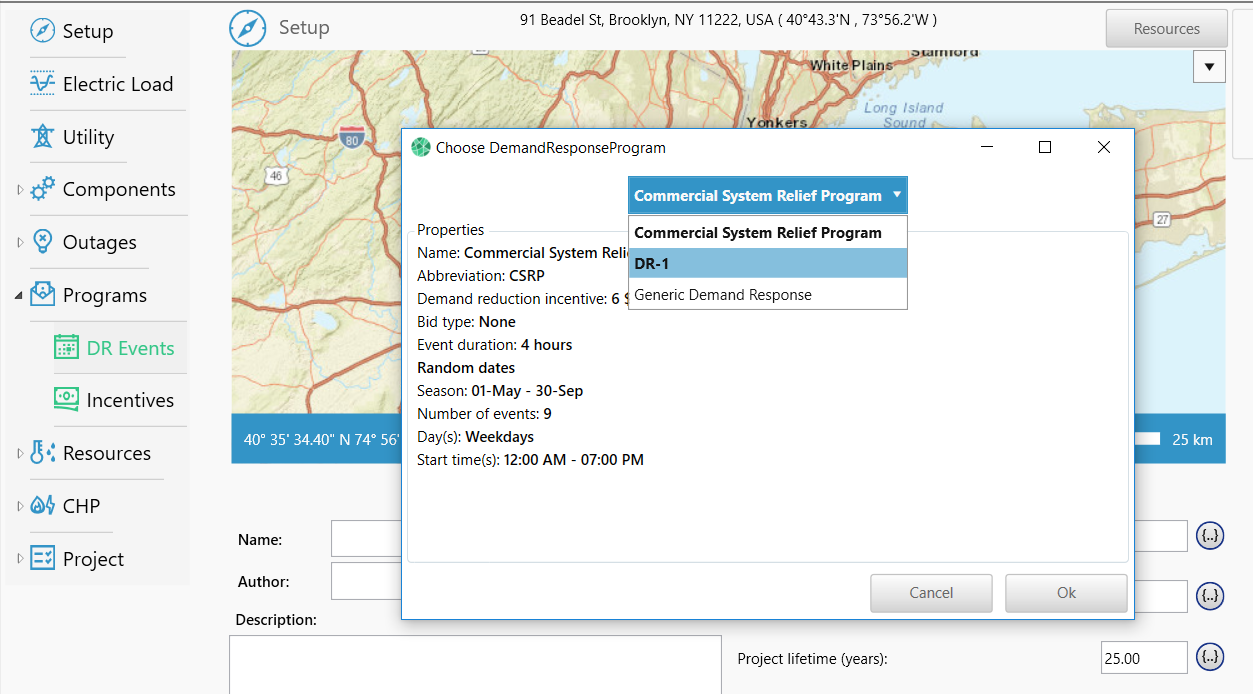
To access the new demand response event in HOMER Grid use the drop down feature. The items shown in bold are created by the user. are user created programs